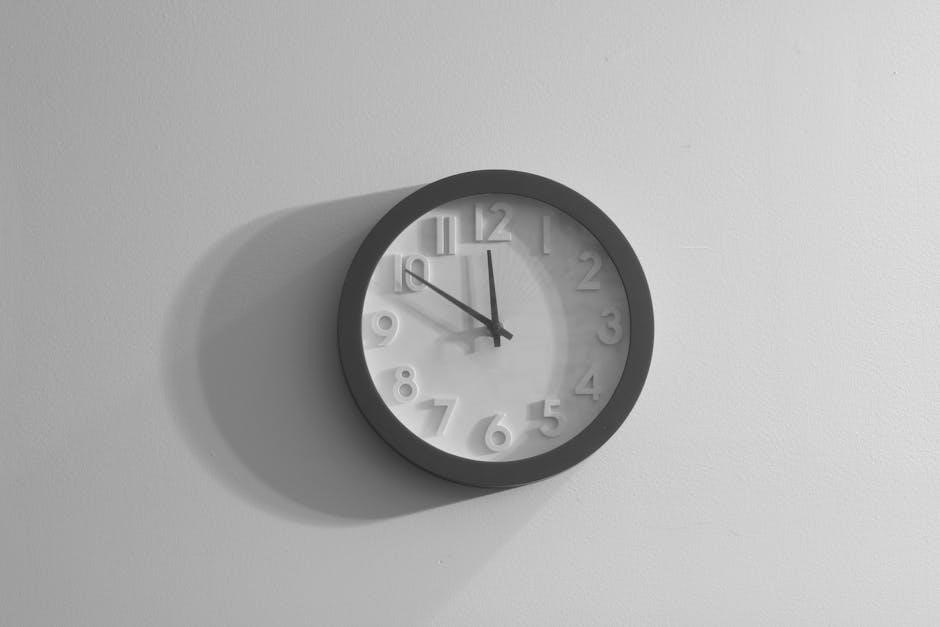
Welcome to the Sharp Atomic Clock Instruction Manual. This guide provides detailed information on setting up‚ operating‚ and troubleshooting your atomic clock. Ensure accurate timekeeping and explore its features for optimal performance.
Features and Benefits of the Sharp Atomic Clock
The Sharp Atomic Clock offers precise timekeeping via the WWVB signal‚ automatic daylight saving adjustments‚ and a clear display of indoor/outdoor temperature and calendar information‚ ensuring reliability and convenience.
Automatic Time Updates via WWVB Signal
The Sharp Atomic Clock automatically updates its time via the WWVB signal‚ ensuring precision and synchronization with the National Institute of Standards and Technology. This feature eliminates the need for manual adjustments‚ providing accurate timekeeping. The clock will attempt to receive the WWVB signal daily to maintain its accuracy‚ enhancing its reliability and performance as an atomic timepiece.
Daylight Savings Time Automatic Adjustment
The Sharp Atomic Clock automatically adjusts for Daylight Savings Time (DST)‚ eliminating the need for manual changes. This feature ensures the clock remains accurate and synchronized with the correct time zone. The DST update occurs seamlessly when the WWVB signal is received‚ maintaining precision and convenience for users throughout the year without any manual intervention required.
Indoor and Outdoor Temperature Display
The Sharp Atomic Clock features a built-in sensor to display both indoor and outdoor temperatures simultaneously. This convenient feature ensures you can monitor your environment effortlessly. The clear‚ easy-to-read display shows precise temperature readings‚ keeping you informed about conditions inside and outside your home. This functionality enhances the clock’s versatility‚ making it a practical addition to any room while maintaining its primary role as an accurate timekeeping device.
Calendar and Day of the Week Display
The Sharp Atomic Clock includes a convenient calendar and day-of-the-week display‚ showing the current month‚ date‚ and day. This feature‚ combined with the time and temperature readings‚ provides a comprehensive view of essential information at a glance. The clear display ensures readability‚ making it easy to stay informed about the current date and day without additional devices. This feature enhances the clock’s functionality‚ offering more than just precise timekeeping for everyday use.

Parts and Controls of the Sharp Atomic Clock
The clock features essential controls‚ including the SET button for manual adjustments‚ the WAVE button for signal reception‚ and the RESET button to restore factory settings. The clear display shows time‚ date‚ and temperature‚ ensuring easy operation and monitoring of all functions. These components work together to provide a user-friendly experience‚ combining functionality with simplicity for accurate timekeeping and environmental monitoring.
SET Button for Manual Adjustments
The SET button allows for manual adjustments when the WWVB signal is unavailable or when customizing settings. Pressing the SET button enables you to set the time‚ date‚ and time zone. It is located on the back of the clock for easy access. Use this feature to override automatic settings temporarily or to configure the clock to your preferences; Ensure you follow the manual instructions carefully to avoid signal interference or inaccurate timekeeping. This button is essential for personalizing your clock’s functionality. Always press gently to avoid damaging the control.
WAVE Button for Signal Reception
The WAVE button is used to manually trigger the clock to search for the WWVB signal. Pressing this button initiates a manual signal reception process‚ ensuring the clock updates its time and date accurately. It is particularly useful during initial setup or in areas with weak signal strength. The WAVE button helps maintain precise timekeeping by forcing the clock to connect to the atomic signal source. Use it sparingly‚ as the clock typically updates automatically. This feature ensures reliability and accuracy in all conditions.
RESET Button for Factory Settings
The RESET button restores your Sharp Atomic Clock to its factory settings‚ erasing all manual adjustments. This feature is useful if the clock experiences software issues or incorrect settings. Pressing and holding the RESET button for a few seconds will revert the clock to its default state‚ allowing it to automatically reconnect to the WWVB signal and download the correct time and date. Use this option only when troubleshooting persistent problems‚ as it clears all custom settings.
Installation and Initial Setup
To install your Sharp Atomic Clock‚ place it in an area with good WWVB signal reception. Insert 3 AA batteries and select your time zone using the back selector. The clock will automatically sync with the atomic signal for accurate timekeeping.
Placing the Clock for Optimal Signal Reception
To ensure your Sharp Atomic Clock receives the strongest WWVB signal‚ place it near a window or in an area with minimal obstructions. Avoid metal objects and electronics that may interfere with the signal. Positioning the clock in a central location‚ away from walls‚ can improve reception. The WWVB signal is strongest at night‚ so consider placing the clock in an area that maximizes signal strength during these hours for reliable atomic synchronization.
Inserting Batteries (3 AA Batteries Required)
Open the battery compartment located on the back of the clock. Insert 3 new AA batteries‚ ensuring the positive (+) and negative (-) terminals are correctly aligned. Avoid using rechargeable batteries‚ as they may cause connectivity issues. Close the compartment securely. The clock will automatically start once the batteries are properly installed. Ensure the batteries are fresh to maintain reliable operation and signal reception.
Time Zone Selection Using the Selector on the Back
Locate the time zone selector on the back of the clock. Choose your time zone (PST‚ MST‚ CST‚ or EST) by sliding the selector to the appropriate position. Ensure the selector is fully aligned with your chosen zone for accurate timekeeping. This setting is essential for proper synchronization with the WWVB signal. Once set‚ the clock will automatically adjust to the correct time for your region. Ensure the selector is secure to avoid accidental changes.
Manual Setting of the Clock
Press the SET button to manually adjust time‚ date‚ and time zone when the WWVB signal is unavailable. Follow on-screen prompts carefully for accurate settings.
When to Use Manual Setting (No WWVB Signal)
Manual setting is required when the clock cannot detect the WWVB signal. This may occur in areas with weak signal coverage or during extended periods without reception. If the clock fails to sync automatically after a few days‚ switch to manual mode. Use the SET button to adjust the time‚ date‚ and time zone. Ensure all settings are accurate for proper clock functionality. This option is ideal for temporary or permanent signal unavailability.
Step-by-Step Instructions for Manual Time and Date Setup
To manually set the time and date‚ press and hold the SET button until the display flashes. Use the WAVE button to cycle through time‚ date‚ and time zone settings. Adjust each value using the SET button to increase or decrease. Once all settings are correct‚ press and hold the SET button to save. Ensure the clock is in manual mode for these adjustments to take effect. This process is temporary and should only be used when WWVB signal reception is unavailable.
Setting the Time Zone Manually
Locate the time zone selector on the back of the clock. Choose your desired time zone by sliding the selector to the appropriate position. Ensure the selector clicks into place to confirm your selection. This manual adjustment overrides the automatic time zone setting‚ allowing you to set the clock to your specific region. Refer to the time zone map provided in the manual for accurate selection. This step is essential for proper time display.

Troubleshooting Common Issues
If the clock fails to receive the WWVB signal‚ ensure it is placed away from interference. Check battery life and replace if necessary. If issues persist‚ reset the clock to factory settings and retry.
What to Do If the Clock Does Not Receive the WWVB Signal
If the clock fails to receive the WWVB signal‚ ensure it is placed in an area with minimal interference. Move the clock away from electronics and metal objects. Check that the batteries are fresh and properly installed. If issues persist‚ reset the clock to factory settings and allow it time to reconnect. If the problem continues‚ consult the manual or contact Sharp customer support for further assistance.
Resolving Battery Compartment Issues
If the battery compartment is not functioning properly‚ ensure it is clean and free from debris. Check that the batteries are correctly inserted with the correct polarity. If the clock does not power on‚ try replacing the batteries with fresh ones. If issues persist‚ inspect the compartment for damage or misalignment. Ensure the compartment door is securely closed. If problems remain‚ reset the clock or contact Sharp customer support for further assistance;
Resetting the Clock to Factory Settings
To reset your Sharp Atomic Clock to factory settings‚ press and hold the RESET button until the display clears. Release the button and insert fresh batteries. The clock will restart and automatically search for the WWVB signal. Once powered on‚ manually select your time zone using the selector on the back. Allow the clock to synchronize with the atomic signal for accurate timekeeping. This process restores default settings and resolves most operational issues.
Warranty and Customer Support Information
Your Sharp Atomic Clock is backed by a comprehensive warranty. For inquiries or assistance‚ contact Sharp customer support directly. Keep this manual for future reference and warranty details.
Understanding the Warranty Coverage
Your Sharp Atomic Clock is covered by a limited warranty that protects against manufacturing defects. The warranty period typically lasts for one year from the date of purchase. During this time‚ defective parts or malfunctioning units may be repaired or replaced free of charge. For warranty service‚ contact Sharp customer support with proof of purchase. Note that the warranty does not cover damage caused by misuse‚ tampering‚ or normal wear and tear. Register your product for extended support options.
Contacting Sharp Customer Support
For assistance with your Sharp Atomic Clock‚ contact our dedicated customer support team. Visit the official Sharp website for contact details‚ including phone numbers‚ email‚ and live chat options. Support is available Monday to Friday during business hours. Be prepared to provide your product model number and proof of purchase for efficient service. Additionally‚ Sharps website offers downloadable resources‚ FAQs‚ and troubleshooting guides to address common issues. Reach out to resolve warranty claims or technical support needs promptly and effectively.