
Corner cabinet plans offer versatile solutions for optimizing kitchen spaces. Free PDF guides, like Ana White’s, provide detailed instructions, materials lists, and step-by-step tutorials for DIY enthusiasts. These plans cater to various skill levels, ensuring easy installation and customization to fit any kitchen design.
Importance of Corner Cabinets in Kitchen Design
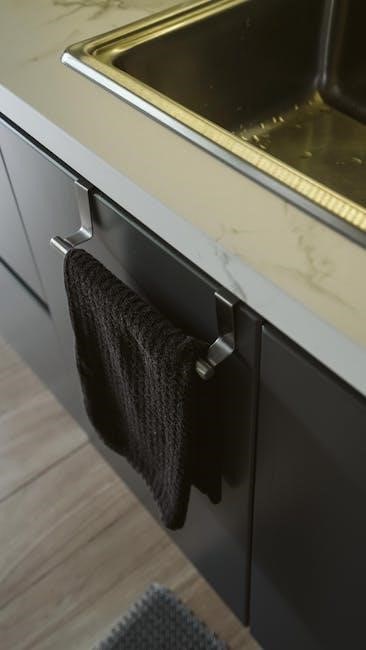
Corner cabinets are essential for maximizing kitchen efficiency, turning dead corners into functional storage spaces. They enhance accessibility, keeping items like cookware or utensils within easy reach. By optimizing often-wasted space, corner cabinets improve organization and streamline workflows. Their ability to fit seamlessly into various kitchen layouts makes them a practical and stylish solution for modern and traditional designs alike. Installing one is a smart way to boost both form and function in your kitchen.
Benefits of Using PDF Plans for Corner Cabinets
PDF plans for corner cabinets provide clear, downloadable instructions, making project planning efficient. They include detailed cut lists, step-by-step guides, and photos, ensuring accuracy. Accessible anytime, these plans are ideal for DIY enthusiasts. Printable and shareable, they simplify the building process, offering a comprehensive resource for achieving professional-grade results without the need for complex tools or prior expertise. This convenience boosts productivity and confidence in your woodworking projects.
Materials and Tools Required
Lumber, plywood, hinges, knobs, and hardware are essential. Tools include saws, drills, sanders, and measuring tape. Ensure all materials and tools are ready for efficient construction.
List of Lumber and Hardware Needed
The project requires 1/2″ plywood, 3/4″ plywood, and lumber such as 1x2x6 and 1x3x6 boards. Hardware includes hinges, knobs, pocket screws, and wood glue. Additional materials like cove moulding and window screen moulding are optional for finishing touches. Ensure all items are measured and cut accurately for a smooth assembly process.
Essential Tools for Building a Corner Cabinet
To build a corner cabinet, you’ll need a circular saw for cutting lumber, a drill for screwing pieces together, and a jigsaw for curved cuts. A sander will smooth surfaces, while a tape measure and square ensure accuracy. Clamps help hold pieces steady, and safety glasses protect during cutting. A workbench provides a stable workspace for assembly and finishing.
Design Considerations
Corner cabinets require careful planning to maximize space and aesthetics. Size and style must align with the room’s design, ensuring proper fit and visual harmony. Accurate measurements and layout configurations are key to achieving functionality and appeal in the kitchen or any room. Proper alignment ensures seamless integration into the corner space, enhancing overall efficiency and beauty.
Choosing the Right Size and Style
When selecting a corner cabinet size and style, measure your space accurately to ensure proper fit. Consider the room’s decor and functionality needs. Styles range from modern to traditional, with options like raised panel doors or simple designs. Resources like Ana White’s plans offer guidance, ensuring your choice complements both aesthetics and practicality. Proper sizing and styling enhance storage and visual appeal.
Understanding Corner Cabinet Layouts and Configurations
Corner cabinets come in various layouts, such as L-shaped, diagonal, or carousel configurations. Each design maximizes space and accessibility. L-shaped units fit seamlessly into corners, while diagonal layouts provide easy access. Some plans, like Ana White’s, offer detailed diagrams and 3D illustrations to help visualize the setup. Understanding these configurations ensures the cabinet aligns with your kitchen’s specific needs and enhances functionality.
Step-by-Step Construction Guide
Corner cabinet plans provide detailed instructions, from cutting boards at 45-degree angles to assembling frames. Each step is supported by photos and diagrams, ensuring clarity and precision for a successful DIY project.
Preparing the Workspace and Materials
Start by clearing and cleaning your workspace. Organize tools and materials, ensuring easy access. Gather all lumber, hardware, and supplies, such as plywood, screws, hinges, and knobs; Verify measurements and cut lists. Use a workbench or sawhorses to support materials. Clamp boards securely before cutting. Safety glasses and a dust mask are essential. Double-check plans and instructions before beginning construction to avoid errors.
Assembling the Cabinet Frame and Shelves
Begin by constructing the cabinet frame using pre-cut lumber. Attach sides and back panels with screws, ensuring squareness. Install shelves according to the plan, securing them with brackets or supports. Use clamps to align pieces perfectly. Sand all edges for smoothness. Apply wood glue and pocket screws for added strength. Follow the plan’s dimensions to ensure proper fit in the corner space.
Installing Doors and Hardware
Attach hinges to the doors and align them with the cabinet frame. Secure the doors using screws, ensuring proper alignment. Install knobs or handles according to the plan’s specifications. Double-check the door’s fit and adjust hinges if necessary for smooth operation. This step completes the cabinet’s functionality, providing easy access to stored items while maintaining a sleek appearance.
Advanced Techniques
Elevate your corner cabinet with advanced techniques like adding raised panel doors for a polished look or reinforcing joints for enhanced durability and stability.
Adding Raised Panel Doors
Raised panel doors enhance the aesthetic and functionality of corner cabinets. Free PDF plans often include detailed instructions for crafting these doors. Start by cutting panels slightly smaller than the door frame to allow for expansion. Use a router or shaper to create the raised edges. Sand and finish the panels before attaching them to the door frame using hinges or screws.
Reinforcing Joints for Durability
Reinforcing joints is crucial for ensuring long-lasting corner cabinets. PDF plans suggest using techniques like pocket screws, dado joints, and corner brackets. Apply wood glue to all connections for strength. Clamp components firmly while securing with screws or nails. Additional supports like corner braces prevent warping, ensuring stability and durability over time, especially in high-use areas like kitchens.
Customization and Finishing
Customize your corner cabinet with painting and staining options to match your kitchen style. Add lighting or decorative trim for a polished look, enhancing functionality and aesthetics seamlessly.
Painting and Staining Options
Enhance your corner cabinet with painting and staining options to match your kitchen decor. Choose from water-based paints for a smooth finish or oil-based stains for a rich, durable look. Consider distressing or glazing for a vintage appeal. Always sand surfaces and apply primer for optimal results. Select finishes that complement your kitchen’s color scheme and style, ensuring a seamless integration with the surrounding design.
Installing Lighting and Other Accessories
Add functionality and style by installing lighting and accessories. Under-cabinet lighting enhances visibility, while accent lighting highlights design details. Consider adding drawer organizers, soft-close hinges, or Crown molding for a polished look. Ensure all installations align with your cabinet’s design and purpose, improving both efficiency and aesthetics in your kitchen or storage space.
Troubleshooting Common Issues
Common issues include misalignment and warping. Check for uneven surfaces and adjust frames. Ensure proper fit by verifying measurements and reinforcing joints for stability and durability.
Fixing Alignment and Fit Problems
Alignment issues can be addressed by checking for square corners and ensuring shelves are level. Sand uneven edges and adjust hinges for proper door alignment. Use shims to correct gaps and verify all measurements. Tightening screws and reinforcing joints helps maintain structural integrity, ensuring a seamless fit in the corner space for optimal functionality and aesthetics.
Addressing Warped or Uneven Surfaces
Warped or uneven surfaces can be corrected by using clamps to hold the material in place while sanding. Apply wood glue to reinforce joints and secure with screws. Allow the glue to dry completely before proceeding. Sanding uneven areas ensures a smooth finish, while shims can adjust for minor discrepancies, ensuring the cabinet fits seamlessly into the corner space.
Measuring and Fitting
Accurate measurements are crucial for a seamless fit. Use a tape measure to ensure dimensions match the space. Check diagonal measurements for squareness and hold the unit in place to mark wall alignment. Double-check all measurements before final installation to guarantee proper fit in the corner.
How to Measure Your Space Accurately
Use a tape measure to record the width, height, and depth of your corner space. Ensure the measurements account for any obstructions like pipes or electrical outlets. Check the diagonal measurements to confirm the space is square. Use a carpenter’s square to verify wall alignment. Double-check all dimensions before cutting materials to ensure a perfect fit for your corner cabinet.
Ensuring Proper Fit in the Corner
Use a carpenter’s square to ensure walls are square and measure the diagonal space. Test the fit with a cardboard mockup of the cabinet. Check for obstructions and mark the back edges to align with the corner. Scribe the edges if walls are uneven. Proper alignment ensures the cabinet fits seamlessly, providing both functionality and a polished, built-in appearance.
Safety and Best Practices
Always wear safety gear, including gloves and goggles. Maintain a clean workspace to prevent accidents. Follow proper tool usage and ensure all materials are secure before cutting.
Following Safety Guidelines During Construction
Always wear protective gear like safety glasses and gloves to prevent injuries. Ensure the workspace is well-lit and free from clutter. Use tools as instructed, avoiding loose clothing that could get caught. Keep materials securely clamped before cutting or drilling. Maintain a clear escape route and avoid overreaching. Regularly inspect tools for damage and never leave sharp objects unattended. Follow all safety guidelines provided in your PDF plans to ensure a safe and successful project.
Maintaining a Clean and Organized Workspace
A clean workspace enhances safety and efficiency. Start by clearing debris and organizing tools. Use storage bins for small parts and label them clearly. Lay out materials in a logical order, keeping frequently used items within reach. Regularly sweep or vacuum dust and shavings. Maintain a designated area for cutting and assembling to avoid mix-ups. A tidy space ensures accuracy and reduces stress during your corner cabinet project.

Additional Resources and Plans
Explore free PDF plans from Ana White, Woodshop Mike, and more. These guides offer detailed tutorials, cutting lists, and expert tips for corner cabinets. Find inspiration and step-by-step instructions to enhance your project with premium designs and customizable options for various skill levels and kitchen styles.
Recommended PDF Plans for Corner Cabinets
Discover top-rated PDF plans from trusted sources like Ana White and Woodshop Mike. These guides offer detailed instructions, materials lists, and customizable designs. Perfect for DIY enthusiasts, they include step-by-step tutorials, expert tips, and photos. Find plans for various styles, from modern to traditional, ensuring your corner cabinet project is both functional and visually appealing. Ideal for all skill levels, these plans simplify the building process.
Where to Find More Detailed Tutorials and Guides
Explore detailed tutorials and guides on platforms like Ana White, The Spruce Crafts, and Woodshop Mike. These resources offer free PDF plans, step-by-step instructions, and high-quality photos. They cater to all skill levels, providing comprehensive materials lists and customizable designs. Perfect for DIY enthusiasts, these guides ensure your corner cabinet project is both functional and visually appealing, with expert tips for a professional finish.