
The Aprilaire 700 is a high-capacity, automatic humidifier designed for whole-house use, offering precise humidity control and energy efficiency. It works seamlessly with HVAC systems to enhance indoor air quality.
1.1 Overview of the Aprilaire 700 Humidifier
The Aprilaire 700 is a high-capacity, whole-house humidifier designed to deliver precise moisture control. It is capable of handling up to 400 gallons of water per day, making it suitable for homes up to 4,200 square feet. This model features automatic operation, integrating seamlessly with HVAC systems for efficient humidity management. Its design ensures quiet operation and minimal maintenance, while the evaporative technology provides clean and consistent humidity levels throughout the home.
1.2 Benefits of Using the Aprilaire 700 Humidifier
The Aprilaire 700 offers enhanced indoor air quality by maintaining optimal humidity levels, reducing respiratory issues and static electricity. It protects wood surfaces and furnishings from cracking due to dry air. The automatic operation ensures consistent performance, while its compatibility with various HVAC systems provides flexibility. Energy efficiency and low maintenance further add to its appeal, making it a reliable choice for whole-house humidity control. Additionally, it operates quietly, ensuring a peaceful home environment year-round.

System Components and Tools Needed
The Aprilaire 700 kit includes the humidifier, digital control, transformer, and installation template. Additional tools like drills, wrenches, and PEX tubing are required for proper setup and connections.
2.1 Furnished Items in the Aprilaire 700 Kit
The Aprilaire 700 kit includes the humidifier unit, a digital humidistat control, 24VAC transformer, saddle valve, water panel, and installation template. These components ensure a comprehensive setup for efficient humidity management. Additional accessories like the drain line and wiring are also provided to facilitate a smooth installation process.
2.2 Additional Tools Required for Installation
For a successful installation, you will need a drill, screwdrivers, wrenches, pliers, and Teflon tape. A voltage tester is recommended for electrical connections. Ensure you have gloves and safety goggles for protection. These tools are essential for properly securing the unit, connecting water lines, and ensuring all electrical connections are safe and secure. Having these tools on hand will streamline the installation process and help achieve a professional-grade setup.
Safety Precautions and Warnings
Always turn off power before installation. Use a 120V outlet directly; avoid extension cords. Ensure proper drainage to prevent water damage. Follow local codes and manufacturer instructions.
3.1 General Safety Guidelines
Ensure the unit is installed by a qualified technician to avoid risks. Turn off power before any maintenance. Use genuine Aprilaire parts to maintain safety and performance. Keep children away during installation. Follow all local electrical and plumbing codes. Regularly inspect the humidifier and its components to prevent malfunction. Do not modify the unit or bypass safety features, as this could lead to hazards. Always refer to the installation manual for specific instructions and precautions.
3.2 Electrical Safety Considerations
The Aprilaire 700 must be connected to a dedicated 120V AC circuit. Avoid using extension cords and ensure the outlet is not powered by the furnace blower. The control requires a 24V AC source, connected to R and C terminals. Ensure all wiring matches the provided diagrams and local codes. Turn off power before servicing. Grounding must be done correctly to prevent shock. Follow all electrical safety standards to ensure safe operation and avoid potential hazards.
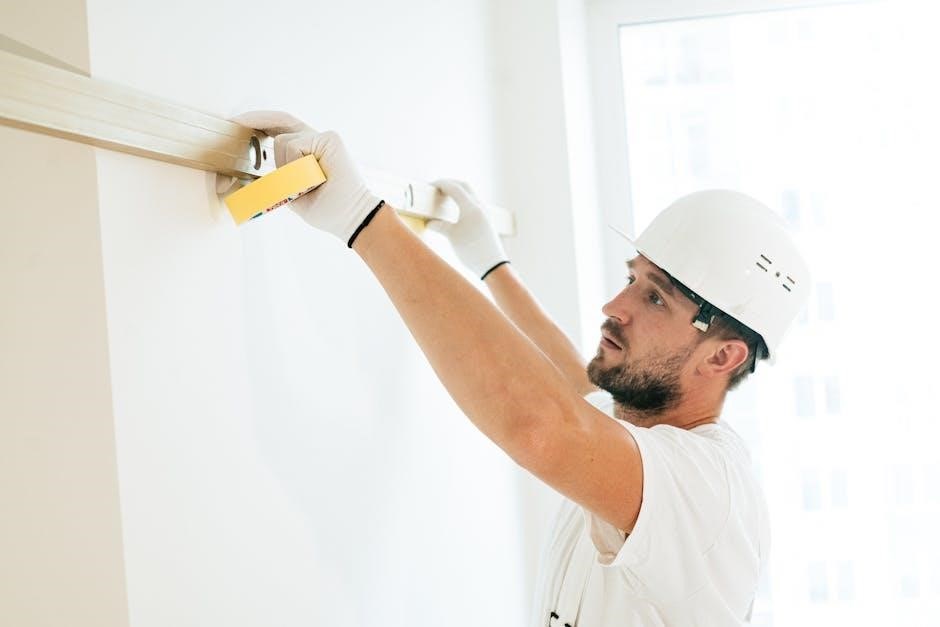
Preparation for Installation
Ensure the installation location is level, dry, and accessible. Verify electrical and water supply compatibility. Plan the layout to align with HVAC system requirements for optimal performance.
4.1 Choosing the Installation Location
The Aprilaire 700 should be installed in a location with adequate drainage and proximity to both water and electrical supplies. It can be mounted on the supply plenum or cold air return. Ensure the area is level and free from obstructions. The humidifier must be accessible for maintenance and troubleshooting. Placement near the HVAC system ensures efficient operation and integration with existing air handling equipment. Proper location selection is crucial for optimal performance and longevity of the unit.
4.2 Understanding Electrical Requirements
The Aprilaire 700 requires a 120V AC power source for operation. The humidifier control must be connected to a 24V AC circuit, typically sourced from the HVAC system. Ensure the power cord is plugged directly into a dedicated outlet, avoiding extension cords. The 24V AC wires connect to the R and C terminals on the control. Do not power the 120V outlet from the furnace blower circuit. Proper electrical connections are critical for safe and efficient operation of the humidifier.

Installation Options
The Aprilaire 700 offers flexible installation options, including placement on the supply plenum or cold air return. It can also be adapted for heat pump systems, ensuring compatibility with various HVAC configurations.
5.1 Typical Installation Setup
The Aprilaire 700 is typically installed on the supply plenum or cold air return of a forced-air system. It is designed to operate with the HVAC blower, ensuring even humidity distribution. The humidifier is usually placed in a central location to maximize efficiency. For heat pump systems, it can be configured to use hot water for improved performance. Proper installation ensures seamless integration with existing heating and cooling systems, maintaining optimal indoor air quality and comfort.
5.2 Alternate Installation Configurations
Alternate setups for the Aprilaire 700 include mounting on the return duct or integrating with specific HVAC configurations. It can also be adapted for use in unique spaces or systems with limited access. For installations requiring manual control, the unit can be configured to bypass automatic features, allowing for precise adjustments. These configurations ensure flexibility, accommodating various home layouts and HVAC systems while maintaining optimal performance and humidity control.
Electrical Connections
The Aprilaire 700 requires a 120 VAC outlet and a 24 VAC transformer for the humidifier control. Ensure proper wiring connections for safe and efficient operation.
6.1 Power Cord Requirements
The Aprilaire 700 humidifier requires a dedicated 120 VAC power outlet. Never use an extension cord, as this can pose a fire hazard. The power cord must be plugged directly into a 120 VAC outlet to ensure proper operation. Additionally, the 24 VAC transformer for the humidifier control must be connected to the R and C terminals on the control. Ensure all wiring connections are secure and meet local electrical codes to avoid hazards and maintain efficiency.
6.2 Wiring Diagrams and Connections
Refer to the provided wiring diagrams for precise connections. The 24 VAC transformer connects to the R and C terminals on the control. For digital control, ensure proper wiring between the humidifier and HVAC system. Manual control setups require connecting the brown wires to the appropriate terminals. Always consult the installation manual for detailed diagrams and instructions. Verify all connections are secure and meet local electrical codes to ensure safe and efficient operation of the Aprilaire 700 humidifier.
Water Supply Setup
Connect the Aprilaire 700 to either hot or cold water supply. Hot water is recommended for systems with heat pumps or the Digital Humidifier Control for enhanced evaporation. Install the saddle valve as instructed to ensure proper water flow and system function.
7.1 Connecting to Hot or Cold Water Supply
Connecting the Aprilaire 700 to a water supply involves choosing between hot or cold water lines. Hot water is recommended for systems with heat pumps or when using the Digital Humidifier Control, as it enhances evaporation. Cold water connections are suitable for standard HVAC systems. Ensure the water supply line is properly sized and fitted with a saddle valve to prevent leaks and maintain consistent water flow. Proper connection ensures optimal humidifier performance and efficiency. Always follow local plumbing codes and manufacturer guidelines for a safe and reliable setup.
7.2 Installing the Saddle Valve
Install the saddle valve on a horizontal water supply line, ensuring it is positioned after the water meter but before any shut-off valves. Drill a small hole in the water line and tighten the saddle valve securely. Turn the water supply back on slowly to test for leaks. Proper installation ensures a reliable water supply connection to the humidifier. Follow the manufacturer’s instructions for tightening torque and placement to avoid damage to the water line or valve.
Drain Line Installation
Proper drain line installation ensures efficient water discharge and prevents damage. Connect the drain line securely to the humidifier and direct it to a suitable drain location.
8.1 Proper Drain Line Setup
A proper drain line setup is crucial for the Aprilaire 700 humidifier to function effectively. The drain line should be securely connected to the humidifier’s drain outlet and routed to a nearby floor drain or utility sink. Ensure the line is sloped slightly to prevent water from pooling, which can lead to mold growth or system damage. Avoid kinks or blockages that could impede water flow. Regular inspections are recommended to maintain optimal performance and prevent issues.
8.2 Ensuring Proper Drainage
Proper drainage is essential to prevent water damage and maintain the Aprilaire 700 humidifier’s efficiency. Ensure the drain line is correctly sloped to allow water to flow freely without pooling. Regularly inspect the drain line for kinks, blockages, or mineral buildup, which can disrupt water flow. Clean or replace the drain line as needed to ensure uninterrupted operation. Additionally, verify that the drain terminates in a suitable location, such as a floor drain or utility sink, to avoid water accumulation or potential mold growth.

Control Wiring
The Aprilaire 700 requires proper control wiring to function correctly. Connect the 24 VAC source to the R and C terminals on the control. Refer to the wiring diagram for specific connections and ensure all wires are securely fastened to avoid electrical issues.
9.1 Digital Humidifier Control Wiring
The digital humidifier control requires a 24 VAC power source connected to the R and C terminals. Ensure the control is properly wired according to the provided diagram. Connect the brown wires to the humidifier’s terminal strip, following the manufacturer’s instructions. Avoid using extension cords for the power supply. Refer to the control’s installation manual for detailed wiring steps and system checkout procedures. Proper wiring ensures accurate humidity sensing and automatic operation.
9;2 Manual Control Wiring Instructions
For manual control, install the control in the return duct or on a wall. Remove the knob and cover for access. Connect the control wires to the humidifier’s terminals, ensuring correct polarity. Use a plastic resistor case to replace the outdoor temperature sensor. Mount the manual faceplate securely. Follow the wiring diagram in the manual for precise connections. Test the system post-installation to ensure correct operation. This setup allows manual adjustment of humidity levels, bypassing automatic sensors.

Post-Installation Checks
Test the humidifier operation, verify electrical and water connections, and ensure proper drainage. Check for leaks and confirm the system operates smoothly under various settings.
10.1 Testing the Humidifier Operation
After installation, turn on the HVAC system and humidifier to ensure proper operation. Check for water flow, misting, and drainage. Verify the control panel indicators light up and function correctly. Test both Automatic and Manual modes to confirm humidity levels adjust as expected. Ensure no leaks are present at connections. Listen for unusual noises and check the drain line for proper water flow. This step ensures the system operates efficiently and maintains desired humidity levels without issues.
10.2 Verifying Electrical and Water Connections
Ensure all electrical connections are secure and meet requirements. Verify the 120V power cord is properly plugged into a dedicated outlet. Check the 24VAC transformer connections to the control terminals. Inspect water connections for leaks, confirming the saddle valve is correctly installed. Ensure the drain line is properly routed and flowing freely. Test the system to confirm water supply and drainage operate smoothly. Verify electrical components are functioning without issues to ensure safe and efficient operation of the humidifier.

Maintenance and Troubleshooting
Regularly replace the water panel and clean the humidifier to ensure optimal performance. Check for leaks and proper drainage. Address common issues like uneven humidity or malfunctioning controls promptly.
11.1 Regular Maintenance Tips
Regular maintenance ensures optimal performance and longevity of the Aprilaire 700. Replace the water panel annually or as recommended. Clean the humidifier and drain line regularly to prevent mineral buildup. Check for leaks in water connections and inspect the drain line for proper flow. Ensure the humidifier is level and securely mounted. Additionally, verify that all electrical connections are tight and connections are not damaged.
11.2 Common Issues and Solutions
Common issues with the Aprilaire 700 include low humidity output, water leaks, or malfunctioning controls. Low humidity may result from improper installation or clogged water panels. Inspect and replace the water panel if necessary. For water leaks, check connections and tighten as needed; If the control isn’t functioning, ensure proper wiring and 24VAC power supply. Refer to the troubleshooting guide in the manual for detailed solutions and reset procedures to restore optimal operation quickly.
Proper installation and maintenance ensure optimal performance of the Aprilaire 700. Follow guidelines for a healthy, efficient humidification system that enhances indoor air quality year-round.
12.1 Final Checks and System Operation
After installation, perform final checks to ensure all connections are secure and the system operates smoothly. Verify that the humidifier activates with the HVAC system, and water flows correctly. Test both automatic and manual modes to confirm functionality. Check for leaks in water and drain lines, and ensure the control panel displays accurate humidity levels. Proper operation ensures efficient humidity control and prevents potential issues. Regular checks maintain optimal performance and extend system lifespan.
12.2 Importance of Proper Installation
Proper installation of the Aprilaire 700 is crucial for ensuring optimal performance, safety, and efficiency. Correct setup prevents issues like mold growth, water damage, or uneven humidity. It also ensures compliance with safety standards and manufacturer guidelines, which are essential for maintaining warranty validity. A well-installed system guarantees reliable operation, improves indoor air quality, and extends the lifespan of both the humidifier and HVAC system, providing long-term comfort and energy savings for homeowners.